This article is a draft of an article that may be submitted to Old Mill News.
While most of the articles in Old Mill News deal with old mills or pieces of equipment and how they function. This article will deal with a side of mills that many of us do which is the photograph of the mill structure and equipment. Many of us began our photographing of old mills using a 35mm SLR (single lens reflex) camera, others have used a more simple point and shoot camera including disposable cameras. With the digital camera coming of age many of us have either purchased or considering the purchase of a camera and understanding the specifications can be confusing. I have also discovered many who made purchases of digital cameras have not been pleased with the results. In this article I will try to explain the specifications of digital cameras and try to help you understand the many choices that you must make in deciding on the proper camera.
First you must have a clear understanding what you want to do with the camera; this is before looking at stores or ads. Without this understanding it is very likely that you might purchase the wrong camera. Some of the questions that need to be answered are:
--What will you do with the pictures you take?
--Are you going to print the pictures?
--View them on a computer screen?
--If you plan to print your pictures than you must decide what size is the maximum size you believe that you will print pictures to be.
If you will display your pictures on a computer screen than a low end camera will meet your needs most likely. If you will be printing your pictures no larger than 4 inches by 5 inches than again the expense of the camera can be minimized; but if you plan to print pictures 8 inches by 10 inches, 8.5 inches by 11 inches, 11 inches by 17 inches or bigger than the expenses will greatly increase. Also if most of your pictures will be of the outside of mills the expense is much less than if you plan on taking lots of interior pictures. The size the image can be enlarged to is based upon two major factors; the number pixels (picture elements) contained within the image and the quality of the lens.
If the purpose of the camera for mill photograph is to take outdoor pictures that will be displayed on a computer screen, the camera should have between 3.1 and 5 megapixels (a megapixel is the number of dots in the image, mega meaning a million), a moderate zoom lens of 3x to 5x optical zoom (never look at the digital zoom when purchasing or using a camera, most cameras that have digital zoom can be turned off and I would highly recommend doing this). This type of camera will also work fine for printing pictures no larger than 4 x 5 inches. These cameras can usually be purchased for less than $200, there are lots of brands to choose from but these are the major features, except the type of media (memory) that the camera uses. There are lots of different formats, Compact Flash (CF), Secure Digital (SD), Memory Stick (two formats, only in Sony Cameras), and many others but these are the three types I recommend, because they are easy to find in discount stores for purchase. Think of the memory chips as different brands of film. Your camera you should also have a USB II connector for connection to your computer. Rechargeable batteries are nice but not a luxury that you must have and in some ways they can be more of a problem on the lower end cameras, because you can always carry a second set of disposable batteries, but you might not have another set of rechargeable batteries and in some cameras the rechargeable batteries cannot be removed. If you plan on taking lots of indoor pictures of mills than I would suggest a higher end camera even if you still are going to display them on your computer. You should use an external flash instead of the built in flash for two reasons, the flash is a real energy drain on your camera batteries and they are usually not bright enough to illuminate the interior of the mill, I would suggest the middle end camera that will be discussed next if interior pictures are you interests. If your camera has a view finder use it instead of the display as this will extend the life of your batteries and the number of pictures you can take, always have your camera set on the highest quality settings as you can always make images smaller, but never improve the quality of the picture.
For those who plan on printing larger pictures, better lenses are needed on the camera and also in general more megapixels. These cameras are very easy to spot in the stores because the lenses on the camera are usually much larger. When you look through the viewfinder you usually are looking through the lens. Yet the lenses are not removable. The megapixel range will vary from 5 to 10 on these cameras. The optical zoom is usually greater than on the previous class of cameras. The expenses of these cameras usually range between $300 and $1000. The media formats are the same as what was discussed earlier. On most of these cameras you can control the shutter speed and the size of the aperture (the opening of the lens), therefore you can experiment with depth of field (the smaller the aperture the more of the image is in focus). This also gives you the ability to stop moving objects like the waterwheel or water falling from the mill dam. These cameras usually have a hot shoe to place an external flash on the camera that will be controlled by the camera, make sure the flash that you purchase separately is compatible with the camera. An 8 megapixel camera is excellent for making a picture as large as 13 x 19 inches.
The final class of cameras are the SLR cameras, the lens will be removable on these cameras and most are manufactured by the traditional camera manufactures (Note Sony has purchased Minolta and they are bringing out a new line of cameras under the Sony name, but they are related to the Minolta cameras). These cameras start at around $500 and upwards of several thousands of dollars. The lenses can be equally expensive. They usually have between 6 and 12 megapixels (cameras for this holiday season have yet to arrive and they may be even greater). One of the features is the ability to take pictures very rapidly, such as 3 to 6 pictures per second. The clarity of the images is better due to the better optics of the cameras, making better enlargements.
There are many ways to get your pictures printed many companies now allow you to upload your pictures via of the internet. Most local stories that print pictures also have computers that can read your memory chip or attach via your USB cable. Note: not all USB cables work on all cameras therefore always keep your cable with your camera. Printing pictures at home is a nice convenience but in general costs many times more than taking it to the store, this includes the small photo printers and the larger computer inkjet printers. Yet the prints that can come from modest price inkjet printers using photographic quality glossy paper can be better than what can be printed at a camera store. I can print pictures in the thousands of dots per inch, but the local camera story prints only up to 300 dots per inch. If you wish to display your pictures online, there are many free or very inexpensive services that will allow for your pictures to be displayed, you need to carefully research the maximum size of the upload picture. I have placed many of my pictures on Flickr.com and they have a group for historical mills. This service gives you a limited amount of upload space free per month or at a modest cost a very large amount of upload space each month.
Film cameras and digital cameras have now reached a point of equality, as long you stay within the specifications of the camera, a cheap film camera would not have made a very good 8 x 10 and neither does a cheap digital camera. Effective use of your digital cameras and video cameras are another whole topic beyond the scope of this article and will be discussed in a future article. I now take nearly all of my pictures digitally.
Monday, September 11, 2006
Thursday, September 07, 2006
Using a GPS to Discover Old Mills
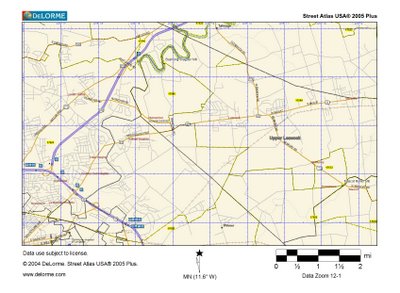
How often have you been looking for an old mill and know you have to be very close but you just can’t located. I know in my searches this has happened numerous times. When I first started looking for old mills more than 20 years ago, I would purchase map books of a state which would have detailed county maps (these books are still available). Before going milling I would take the SPOOM (Society for the Preservation of Old Mills) mill list (The mill lists provide directions to mills and are usually very accurate.) and try to plot the location of the mills I was hoping to visit. Generally I was able to locate the mill that I was wishing to photograph, but several times I just could not find the mill. With the technological improvements in computer technology, I started using a GPS (Global Positioning Satellite) Receiver, a laptop computer and mapping software; I also needed a power inverter to power the computer from my cigarette lighter. The first couple generations of the software was somewhat limited, the GPS took a long time to link with the computer through the serial port and the laptop computers were relatively slow compared to our current standards, so map regeneration took a few seconds. Today I use a Bluetooth wireless GPS receiver that connects to my laptop computer. I also have a hand held GPS which connects to my PDA (Personal Data Assistant) by the compact flash slot. The same software can be loaded on both my PDA and laptop. When I locate a mill I create a waypoint for the mill and potentially other components around the mill like the mill dam, race and other structures. Therefore the GPS shows my position but in general does not locate the mill for me since no one as recorded its position, but instead I use the GPS to locate the position of the mill that can be used by others. Some of the software packages will show elevations on the map and some will show the old mill ponds which can assist in the locating of the mill. For a few of the mill someone else has geocoded (latitude and longitude) the position and that can be programmed into the software and which will determine the shortest or quickest route to the mill from any starting position. Therefore, by using a GPS we can position the mill to a high degree of accuracy so that future generations will have the pleasure of locating these wonderful structures. Hopefully people will share there mill positions so that it will become easier to locate the mills, much as was done in the creation of the mill lists. SPOOM mill list do have a fields for latitude and longitude.
A GPS receiver works by measuring the time that it takes for a signal to reach the receiver from multiple satellites orbiting the earth. By knowing the time for the signal from each of the satellites to reach the receiver, the distance to each satellite (the position of these satellites are very accurately known) can be computed and by using trigonometry your position on the surface of the earth can be determined in 3D, latitude, longitude and elevation. The more satellites that the receiver can detect the more accurate your position, most GPS units will be accurate to 30 feet or less. The accuracy of the GPS is dependent on the number of satellites and number of digits of accuracy that the unit can receive. Some of the units can also detect ground stations that have a position that is known to a high degree of accuracy and can further reduce the position error. A GPS is only a receiver unless it contains a cell or satellite phone, many trucking companies utilize GPS technology and a satellite phone to determine the position of their trucks at all time. Therefore, the home office can locate every vehicle at any moment. A determination of the speed of an object can also be calculated, since the GPS is determining the position at regular interval of time, the accuracy of the speed determination can be as good as your speedometer.
If you looked at purchasing a GPS unit you know there is a whole range of devices and prices. The simplest type of GPS is the ones contained in many cell phones today (all new cell phones have a GPS), usually to utilize the GPS you must pay for a service. If you want to purchase a GPS unit there is a complete range of prices and abilities and I will try to describe some of the different types of GPS units. A completely standalone unit can be purchased and will vary in cost from a few hundred dollars to several thousand dollars depending on the abilities of the instrument. If you want a device to provide only the longitude and the latitude of your position they are relatively inexpensive. The next step-up is those GPS units that provide monochromatic maps of the region on the display. The more advanced system offer more detailed color maps. Some of these units can be connected to a computer so that you can download data and others the data must be manually recalled if you wish to plot it on a computer map. The second type of GPS utilizes as PDA like a Palm Pilot or a Dell Axiom. Maps can be loaded into PDA from a computer and can either be directly connected to the GPS via cable, PCMCIA Card, Compact Flash Slot or by Bluetooth wireless. These units are small and more expense than the low end standalone GPS, but much more flexible since they can be connected directly to a computer and maps can be upgraded as changes occur. They also retain the function of the PDA. The third method is to use a GPS either directly connected to your laptop computer by a USB cable or wireless connection. These devices are the most flexible and provide the most power to the user, but also the most expensive unless you are already have the laptop computer. Of course we also have GPS units in some cars.
With most all GPS units you have the ability to store a position and name the position that is stored, like Pierce Mill Dam. These positions are called waypoints. The position of the mill, the dam, the race can all be stored within the accuracy of the device (30 feet or less) as was discussed above. This geocoding of the position of dams can than be placed into a GIS (geographical information system) system and stored on maps that can be displayed over the internet, with roads and other major features labeled.
So instead of missing that mill that was just around the corner in the overgrown field we can find the location every time if someone provides the accurate latitude and longitude of the mill. In most GPS you can put in the position that you want to locate and it will direct you either by displaying directions and distances away from the point, or on more expensive systems it will display the roads and directions of each turn to reach the site and the upper end systems will map it for you displaying your current position, your end point, display the roads, giving directions, even speak to you when you need to turn and if you get off the road it will reroute you. Of course every once in a while the computer map is not correct, most of these maps were developed from either aircraft imagery or satellite data. I was recently searching for a mill in the Catskills in New York state and the road in which the computer told me to take to reach the mill that I had (from looking at a website) did not reach the mill, about half way up a mountain the road became a dirt path, so every once in a while technology can fail you.
For the last several years I have been geocoding the mills sites that I have visited and will be in the near future placing them on an interactive website for others to use. If anyone would like to send me the locations of mills I will be happy to add them to my data. I can be reached at vince.dinoto@kctcs.edu.
Podcasting
FAQ Podcast
What is a Podcast?
A podcast is either an audio or video file that can be downloaded and played on an ipod and other mp3 players (for video you must have a video enabled device). The podcast is then loaded onto a website with an RSS (Really Simple Syndication) feed. The RSS feed allows for automatically updating the user’s computer with information that has changed on the website (RSS is a XML file). Therefore new items can be posted and then downloaded to users as needed. The RSS can be used for other purposes than podcasting.
Why might I use a Podcast?
Using a podcast for an educational purpose has many potential uses. After a set of homework has been turned in by students, the solutions could be composed as a podcast. Very important review points could be a podcast. Lectures could be converted into a podcast. Additional material beyond what is traditionally lectured. Discussions among multiple individuals could be recorded and placed into this format. These are a few potential uses of podcasting.
How do I create a Podcast?
As stated earlier, there are two types of podcast; audio only or video (which includes audio). Most iPod and mp3 players can receive an audio formatted podcast. Currently, video created podcasting can be displayed on a much smaller number of devices. Podcast can be displayed directly on a computer without the need for an iPod or mp3 player. Podcasting currently is displayed using Apples iTunes player, which uses Quick Time.
An Audio podcast requires that the creator has a software program that will save mp3 files. There are many different products that can do this but, in trying to show ways in which this can be done at the lowest possible cost, I will recommend a free product. Audacity is a very nice audio editor but, to save the file as an mp3, you must also have a free product called Lame. Links to Audacity and Lame are included below. You must also have a relatively good microphone/headset. Once the audio file has been completed, reviewed, and saved as an mp3 file type, the file must have been saved in a folder that can be uploaded to a webserver. Next you need to create the RSS xml page. This page can be created in wordpad or any other text editor. The RSS accumulator has two parts, a subscription part and a episode part (the episode is related to the file you created and will be repeated in the RSS file for additional events). I have provided a link to the code since the blog kept trying to run it, the code was postd on a website at MIT and provided a link to this website.
http://vince.jcc.kctcs.edu/podcasts/rss.htm
You will want to place your information within each area of bold font. The part listed in the channel is the part for the subscription. The part listed under item is the part that you will change for each episode or event and your file may have multiple copies of this. Finally, you will need to create a podcast page; this page can be created in any web editing software that you wish. This page needs to describe what the purpose of the audio file is. It should be named default.htm. On this page you should have a place for people to subscribe to your podcasts. A button should be linked to your RSS file. Make sure you save your default page in the same location as your RSS file and, since this whole folder will be uploaded to the server, your audio file should also be in this folder.
Video file production is a little different. It is also known as Vodcast. You will need a digital video camera and a tripod. First, you will need to video tape the information you wish to share. Next, you will need to edit the video, adding title slides and transitions. There is lots of software that can do this editing for you. Microsoft Moviemaker 2 is a free product that can be used if you are running Windows XP. You will need to save your podcast in a size for the iPod of 320 x 240. Once the movie file has been created you will need to save it in an H.264 format; this will require opening up your saved video in Quicktime Pro (not the free version) or use a free converter from the web.
For those using an iMac, the iLive software has built in templates.
How do I publish a Podcast?
Once you have created your webpage, RSS files, and placed your audio and/or video files in the same folder, you will need to upload this folder to a webserver. There are many different uploading options from free locations, iTunes, or your own institutional servers.
What software is needed to create and publish a Podcast?
You will need an audio editor that can save a file as an mp3; if you are doing video editing, you will need a video editing software. Free software is available for both of these formats. You will need to have iTunes running on your computer so that you can make sure that your site is functioning. You should also have access to an iPod to insure that your podcasts are functioning properly. It is important that the file formats are proper and, in the case of video, that the size is appropriate.
What hardware do I need?
For audio podcast, you need only a microphone. For video podcasts you need a digital video camera.
What software will the students need for Podcasting?
The students will only need to have iTunes to hear or view your podcasts. To play your podcasts external from a computer, they will need either an iPod or mp3 player.
Links
http://web.mit.edu/ist/podcasts/makepodcast.html
http://en.wikipedia.org/wiki/RSS_(protocol)
http://www.timmadden.com.au/podcast-logos.htm
http://www.pixagogo.com/5111825842
http://web.forret.com/tools/podicons.asp
http://audacity.sourceforge.net/download/
http://en.wikipedia.org/wiki/Vodcast
http://www.globaladvancedmedia.com/html/creatingvideopodcasts.html
http://www.globaladvancedmedia.com/html/allaboutpodcasting.html
http://www.videora.com/en-us/Converter/iPod/
Subscribe to:
Posts (Atom)